3D Modelling Final Project - Alice In Wonderland
For my final project I decided to re-create the Alice in Wonderland tea party scene. I wanted it to be as recognisable as possible but have my own touch on it, we have to make 6 objects but i will be making more than 6.
Firstly i started by trying to create the table legs, i wanted them to look Tim Burton style, I achieved that but the object had to many polygons and it took to long to render, which was making the software run slow, so i decided to try something different.
I had a look at a couple of different tea party pictures and seen that in one they have used separate tables instead of one big one so i made 1 round table and 1 square table. To make the table legs i used the Lathe NURBS. I put a picture on the front perspective and made sure the center of the picture was in line with the Y axis as i will be only outlining half of the table legs. Using the Bezier i roughly drew an outline of the table legs then dragged the spline into the Lathe NURBS to make it a child. The Lathe NURBS spins the outline you've made 360 degrees. To create the 6 tables i just copied and pasted the tables, the tables will later have cloths on the top.
After i made made my 6 tables and were happy with them i started making the chairs and stools.
To create the legs i made the outline using the Bezier tool then Extruded that to make it 3D. To create the handles again i drew an outline using the Bezier on the Y axis then used the Lathe to make it a 3D object. I had to scale, rotate and move to make sure it was in the correct place. Next was making the cushion, i used a cube then scaled it down so it was rectangular and slim, i then copied and paste that shape and clicked on fillet in the object properties this makes it rounded and cushion like.
Heres a preview of the tables and stool.
Next step was to make the chair. firstly i used a Bezier to create the circle then Sweep NURBS it to create the outer ring for the back rest. Then to make it bend i made the shape editable made sure i was in points mode then pulled the points back.
Same with the legs on the stool i made the shape and extruded them to make them 3D.
Heres a preview with the tables, stool and chair. This is in render mode, render mode shows you the final model and what it will like like finished.
Next i wanted to make the books and stack them as they are in the picture so i made 1 book by using a Bezier then extruding it to the length i was happy with and copied and pasted it onto the tea party.
Once i copied it into the tea party and then kept copying it and scaling them. I will add a material at a later time. I added a material on the chair, which is a chrome just to test it. The tables also have a wood finish on them. I added the material by creating a new material then browsing through the different materials built in the software until i was happy with one.
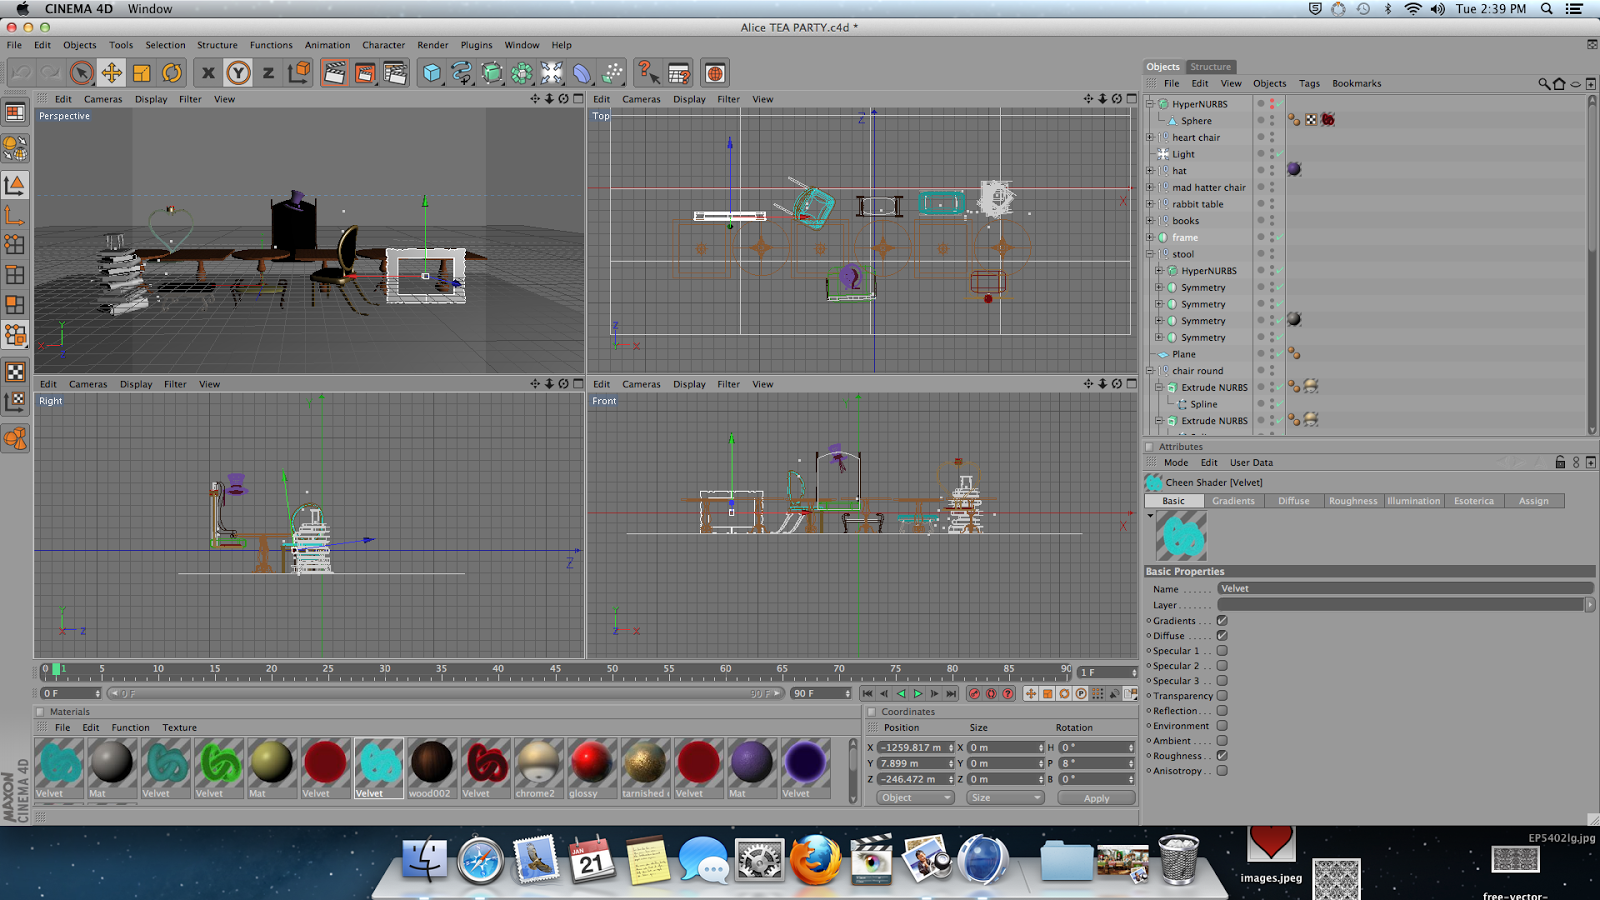
Heres a look at my models form each perspective. Up to now without counting the copied models i have made 6 models.
Here i have an extra chair/stool and a frame. To create the frame i just made an outline using the bezier then extruded and used the symmetry to make it a full frame.
My next move was to make the mad hatters hat. Firstly i found a picture of the hat, i had to make sure the image was from straight on. Then to get it onto Cinema 4D i got my self onto front perspective, then pressed shift + V which brought up the viewport, then click on back and upload it. To create my shape i have to make sure the middle of the image is on line with the Y axis i do this by altering the offset.
Once everything was lined up correctly i used the Bezier and made an outline of the bottom of the hat, then made the spline a child of a Lathe NURBS. I did the same with the rest of the hat to make it 3D
To create the cloth i used the Bezier and made an outline of the dangly bit then extruded the spine and from there i extruded it over the hat base and used Hyper NURB so it wasn't so squared off.
I then added a velvet material onto the separate parts, i took the roughness of the materiel to make it look more soft. I then took a picture of a floral pattern from Google, making sure it was black and white. Then on the material i added a bump and uploaded the picture, this creates an illusion that the object has a patterned style to it.
I then added it to the teaparty. Ive put it above madhatters chair so people would know thats where he would sit.
This close up version allows you to see the detail in the hat and how effective the bump is. The bumps strength can be change so its not as prominent.
preview of the scene with the hat. I am proud of progression at this point and have already made over 6 models. This is helping my knowlege and skills increase with the software. At this point i have gained more of an understanding of how the models are made.
Next I decided to make the queen of hearts chair. This was the most difficult model i made. As i made the mad hatters hat and placed it above his chair to create the illusion that he'd be there i felt i had to do it for this chair. So i firstly made the outline using the Bezier tool to create a spline, then extruded and used symetry to make the other side. I then made the crown for the queen using the cylinder shape.
I had the cylinder shape but needed to make the points so i made the shape editable and used the knife to cut away the pieces of the cylinder i didn't want, once i got the points i was happy with i needed to get rid of the base so i used the polygon tool to pick the faces i needed to delete. I did try to create a love heart cushion but i didn't like it so eventually i got rid.
I haven't modeled the legs for the chairs as they wont be visible when the scene is finalized.
Once i made the majority of the models to scene i wanted to see what the materials looked like on the models. When i started adding the materials i really started to dislike what i have made. The colours were too dark and they didn't fit what i imagined and i knew if i didn't find a way to change the materials then i wouldn't be happy. I spent a couple of lessons changing the colours and the materials.
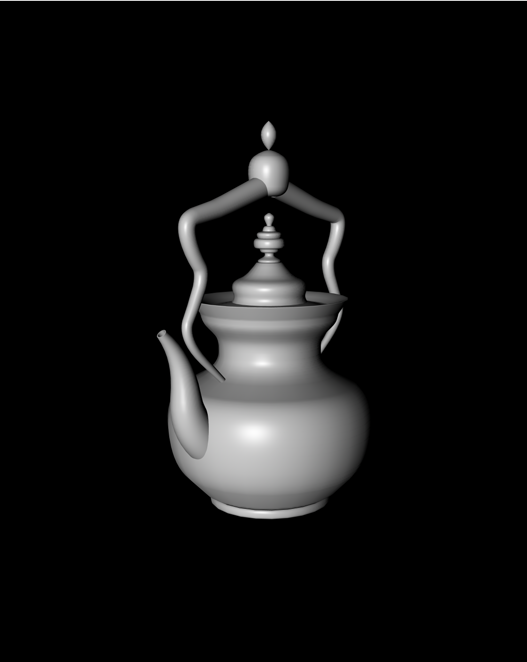
Here's a model that will be on the table, to make this i simply used the Lathe NURB, the Lathe is such a useful tool on Cinema 4D for creating little objects like this. Firstly i uploaded a picture of a tea pot onto Cinema 4D and used the Bezier tool to create an out line remembering it has to be along the Y axis. Once i was happy with the outline i made the spline a child of the Late NURB which rotated the spine 360 degrees. I then carried on that same process with the lid, it's a much easier way to do the Lathe in segments rather than trying to do it all in one, doing it all in one will most likely result in your outcome failing and not being the final shape you hoped for. To make the handle i used the Bezier and made a line in the direction of the handle on the picture, then added a Circle spline through the Y and X axis then made the two splines a child of the sweep NURB which sweeps a profile along the spline. I then altered the end scale to make the ends slimmer. I am very happy with the outcome of this model.
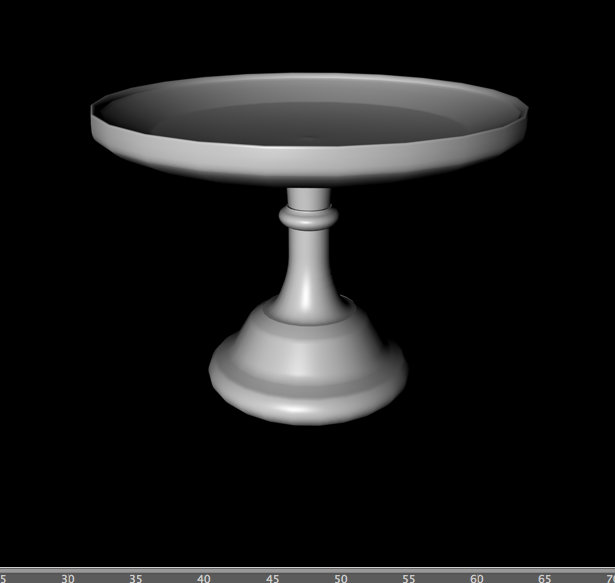
Again, i simply used the Lathe NURB for this cake holder.
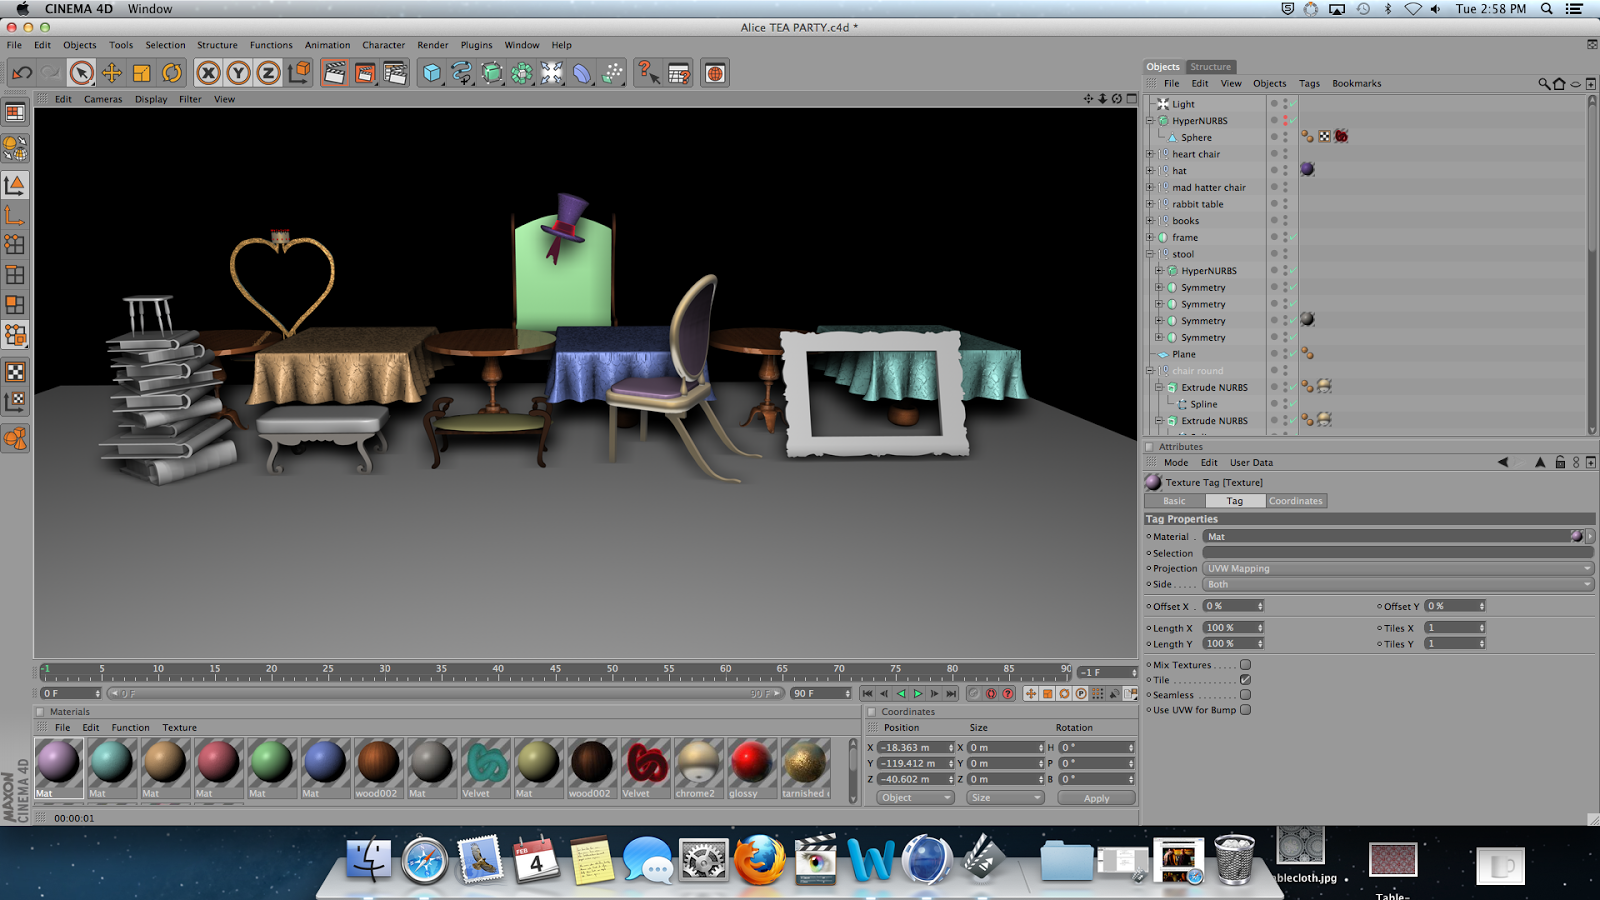
After coming away from the materials for a while and making small models i decided to come back to the materials and give it another go. I changed alot of the materials and changed the colours, making them pastel like, this gave me a much nicer colour and i again was happy with the scene.
To create the table cloths i used a plane, made it editable and pulled down the points and altered them till i was happy. To create the material i used a bump in the materials which gives the illusion the object has a pattern. Then i figured you could create your own textures using this little tool, i made most of my own textures by finding a picture of the texture i needed then uploading it onto the model, this was a big help and made it a lot easier for me rather than using the materials already built in the software. When i first made the cloths and applied the material the cloth appeared stretched over the edges of the table, so i changed the projection of the material to cubic.
No i wanted to add a material to the frame so i got the frame i originally made the outline from and loaded the picture onto the materials, i also uploaded the picture onto the bump as well too create the illusion its 3D. Once i uploaded it i needed to change the projection to cubic and scale it with the texture axis tool to fit the model.
I am so proud of the scene up to now i have really surprised myself with this software, i really thought i would struggle. Up to now there is 13 models when really i only had to make 6.
I refereed back to the picture i was copying and seen there was more chairs, as i wanted mine to be as close to the picture as possible i needed to make 2 more chairs. I started to model the chair for the White Queen. Firstly i used the sweep NURB to create the back of the chair, to use the sweep i clicked onto the front viewport and used the Bezier to draw a spline along the Y axis, i then add a circle and scale it down, the size of the circle will determine the size of the back. I then made the circle and spine a child of a sweep NURB.
Heres the scene in render mode with more little objects such as cups, saucers, cake holders and tea pots.
I wanted to make some cakes for the table. I started with creating a cylinder scaling it and making it editable. I then switch into points mode and drag some in and some out to create a cupcake base. I then closed the polygon hole at the bottom.
to create the cake itself i used the LatheNURB, i firstly drew and outline along the Y axis and then made that spline a child of the LatheNURB, i did that another 4 times.
I then added the pastel colours in, i did a different colour for each layer of icing.
When i was previewing the scene my books were appearing black. I noticed the textures were missing so i had to re-download the images i used for the texture.
Here you can see a figure in the scene to give a sense of size and scale that the objects were made.
At this point the environment was what i needed to change so i made grass for the floor as i think it looks cute and very Tim Burton.
This is my scene from different angles. I have made 21 models here.
I knew my scene wasn't finished, when i looked at it, it just looked uncompleted so i decided the make the mushrooms using the LatheNURB and SweepNURB and added the textures on that i had taken from the internet.
As you can see here i added in a caterpillar. I used a sphere to make it then copied it and pasted it and attached them, again i took a material from Google to create the material for it.
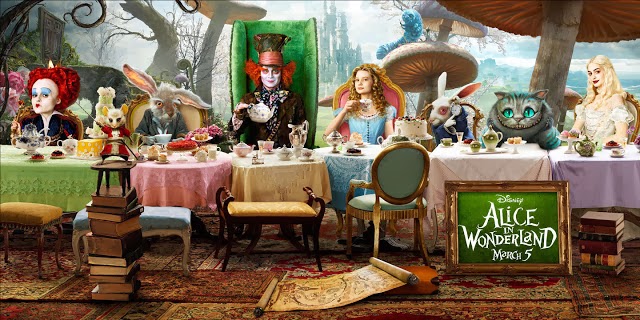
This is the picture i was copying and referring to throughout the modelling process. I am happy with my final project. I started out thinking i wouldn't be able to use the software and make the simplest of models but i got my head down and with help from my tutor at the beginning i managed to surprise myself with the use of the software Cinema 4D. We were asked to make 6 separate models and i modelled 23 into a scene, they may not be big but i put in the effort to try and make this as noticeable ad detailed as possible. Once i learnt how to use the basics of the software i was abled to test my self with other models. I am proud of the knowledge I've learnt such as how the tools work and why it does what it does, i'm also proud of the effort i put into this unit to learn the software and model something i would like. I have met the deadline on this unit and made more than needed.


